
On chunkier or large fonts it's achieved fairly easily but on the finer script fonts or at small sizes it can be really tricky, if not impossible without this workaround.
The difficulty is that the minimum movement you can achieve with the mouse using their tool is sometimes just too much for those fonts and you end up with ugly gaps that make the whole look unconvincing.
The trick is to create the first copy, move it the smallest that you can and then copy and paste the original again. You now have the original plus two copies. The second copy is on top of the original and the first copy where you placed it. You then use the "Arrange->Space selected evenly (horizontally)" tool.
But I'm getting ahead of myself.
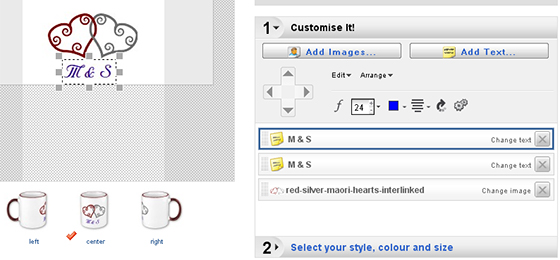
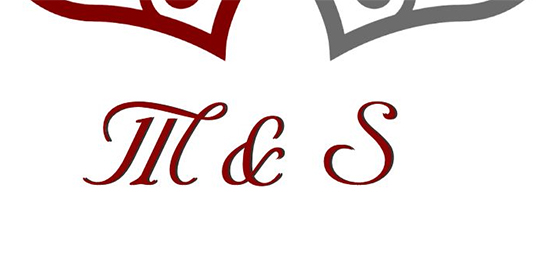
Here's the starting point and I want a drop shadow on the monogram text, "M & S"

So I copy and paste the text:

In this next shot, you can see that I've shifted into design mode, changed the colour of the pasted text to blue and moved it to the right by the smallest amount possible. The drop shadow is on top of the original text so I still need to move that layer behind the original. I'll do that next (by moving the layer in the "customise it!" so that it's second in the list).
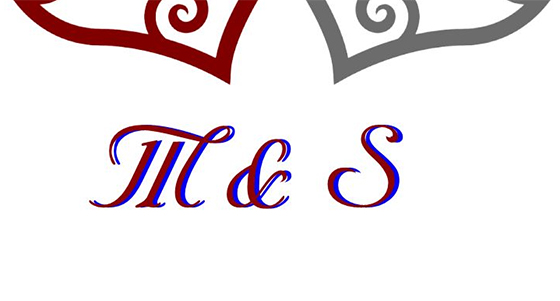
So I've moved that blue text layer down and this is the enlarged view that the tool provides.
So back to design mode to prepare to copy and paste the original again, ready for the workaround.
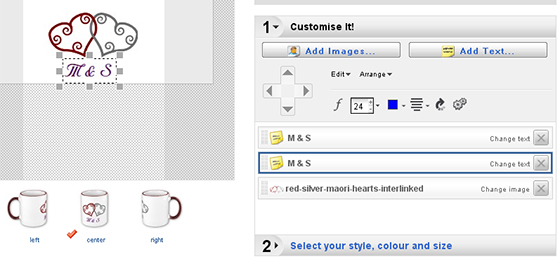
In the next shot you can see I've copied and pasted the original again, giving me the three copies I need. The top two are the original text and its latest copy, both maroon and on top of each other. The third M & S is the moved blue copy.

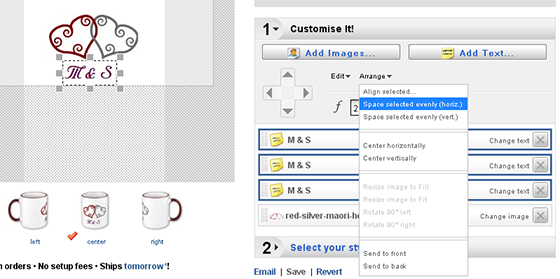
So I'm now ready for the workaround. I've selected all three copies of the "M & S" monogram text and I'm choosing "Arrange->Space selected evenly (horiz)"
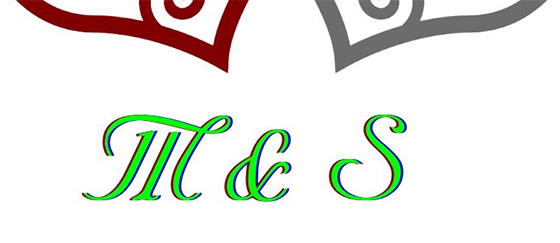
In the next shot, I've changed the latest maroon copy to green and you'll see that its layer is still the topmost of the three.

...and here it is in the tool's magnified view. You can see that the green text (topmost layer) sits between the maroon (original) and blue (first copy taken) and is just the right distance from the maroon.
The next step is to delete the blue copy, and move the green layer in the "Customise it!" section so it's second in the list, under the original maroon:

All that's left to do now is to change the green colour to a dark grey, so it looks like a shadow, and show you the magnified view:
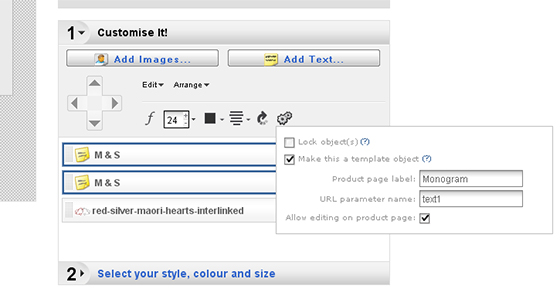
For completeness, here's me making the text customisable. I select both copies and hit the little gears icon. By selecting both, they will be given the same "Product page label" and "url parameter name". This means that the customer will see only one box to type in their monogram but what they type will be applied to both copies.
In conclusion, I hope you've followed and understood the above and that you'll be able to apply drop shadows to your own customisable text, using the workaround when the standard way looks unconvincing.
I've only shown a drop shadow to the right but you can use the same principle to have the drop shadow placed right and down—I'll leave that to you :)
Happy Zazzling!
Comments encouraged and welcomed :)
Woo hoo. A place to learn more about zazzling. Great!
ReplyDeleteNice blog - I'm following. Thanks for bringing my attention to this tool - I'll come back to your post to study & apply :)
ReplyDeleteOops! I'm awfully late in replying! Thanks to you both for your kind words :)
ReplyDeleteThanks for sharing this great information. I'll have to try this.
ReplyDeleteYou're welcome, Jenalee :) I'm glad you feel inspired to give it a go!
ReplyDelete